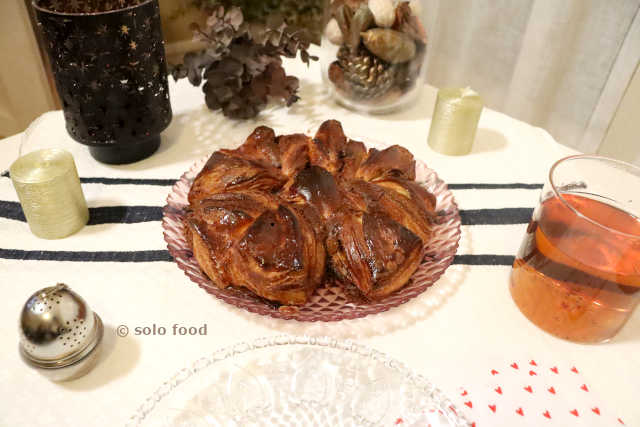
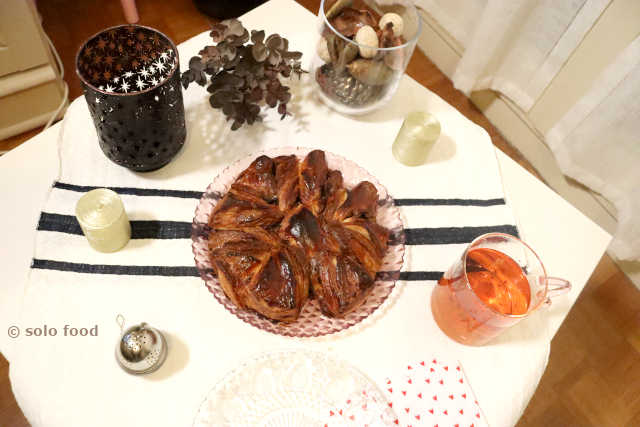
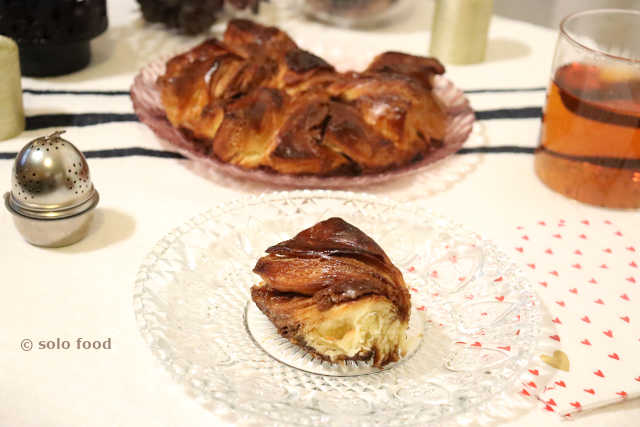
Danish pastry are simply incredible! They come in many shapes and in a multitude of fillings but the remarkable thing it’s their dough which is by far more smother (thanks to the eggs) but still flaky. Furthermore, it has a perfume of cardamom which makes the pastry so unique! Take the time and make this dough, it’s worth to be made and you are worth it also! It’s up to you now but know that eating them the day of their cooking it’s best!
In two words:“Our knight, after taking all the measures, he did not want to wait much longer in order to give himself to the public, as its delay would make him responsible for all the bad things in this world that were in need of repairing and of all the injustices to which he could bring comfort”.
Miguel de Cervantes Saavedra, Histoire de l'admirable Don Quichotte de la Manche Tweet
difficulty – a good amount of technical skills is required
preparation20’ + 2 days of rest in the refrigerator to eat it the 3th day for a Sunday brunch or 1,5 days to eat it the 2th recipe
cooking - 22’-24’ (for the Danish in star shape) + 20’ (for the individual Danishes in a snail form )
serves - 4
Ingredients
for the dough
- 2 + ¼ cup of all-purpose flour
- 45gr of caster sugar
- 1 teaspoon of fleur de sel or coarse salt
- ¼ teaspoon of cardamom (*)
- 60gr of butter (soften)
- ½ cup of milk
- 1 package of active dried yeast
- 1 egg yolk (large)
- 1 egg (large)
for the flat rectangle of butter
- 170gr of very soft unsalted butter
- 1 tablespoon of all-purpose flour
for the Danish with brown sugar and in the shape of a star
- 70gr of brown sugar
- the zest of half an orange
- ¼ teaspoon of cinnamon
- 1 teaspoon of orange juice
for the individual Danishes in the shape of small snails
- 50gr of caster sugar
- ¼ teaspoon of cinnamon
- a bit of apricot jam
to golden the top and glue the dough when needed
- 1 egg (large)

Steps
to start
- Before starting to work with this dessert, you need to have your butter really-really soft; to this end, you need to take your butter out in room temperature for almost 24h (or at least for a night) before starting making the dessert
for the dough (initial rest in the refrigerator)
- In a big bowl, beat to mingle together with an electric hand mixer:
- the flour
- the sugar
- the salt
- the cardamom (*)
- Add the butter very soft butter and keep beating
- Add the egg yolk and keep beating
- Add the egg and keep beating with the electric hand mixer
- In a small casserole, add the milk and heat-it up until 43°C
- Stir in the milk the active dried yeast and then pour everything into the dough slowly and continue to beat until the milk is absorbed by the dough
- Once the milk is absorbed, continue to beat for a little bit but then start working the dough with your hand for about 3’
- Add a little flour on to the working plan and start working the dough with your hands:
- form a ball
- press the ball in the middle with your palms and open it away from you
- bring the upper part towards you as to fold it again
- fold it from the left and then from your right
- repeat and turn it over from time to time by applying the same movements
- sprinkle some flour from time to time if needed but
- remove the exceedance of flour with a cooking brush
- In a few minutes a beautiful dough is going to take shape and at that time you need to fold it in plastic wrap and place it into the refrigerator for a night
- Next start building the rectangle of butter:
- beat up with the electric hand mixer the very soft butter until it becomes like a cream
- add the flour and keep beating
- spread the butter onto a try covered with plastic wrap; use an offset spatula to form the rectangle as thick as 2mm
- the dimensions of the rectangle should be large enough as to contain a rectangle of 15cm x 15cm
- cover the rectangle with plastic wrap in contact with the butter and place the tray into the refrigerator overnight like the dough
to finalize the dough
- Before starting working the dough, get the butter out of the refrigerator for a few minutes in order to soften it a little bit
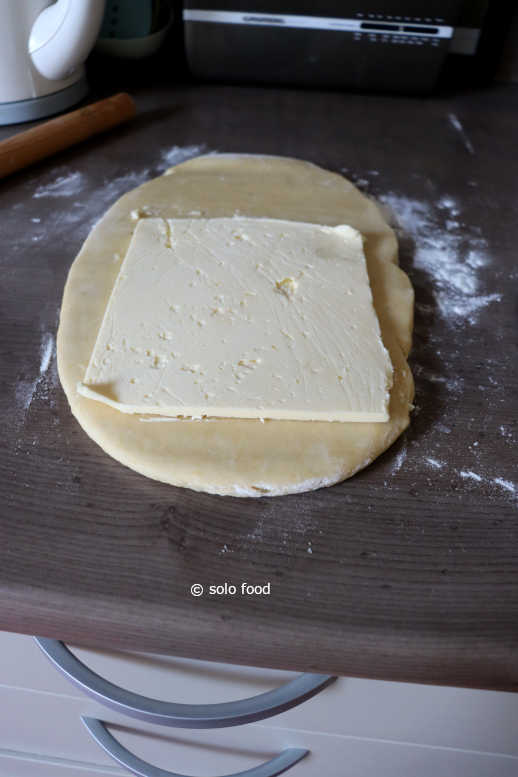
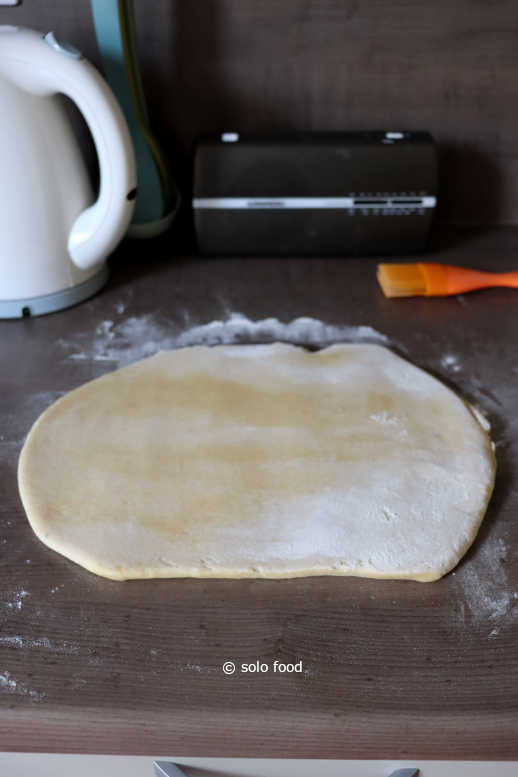
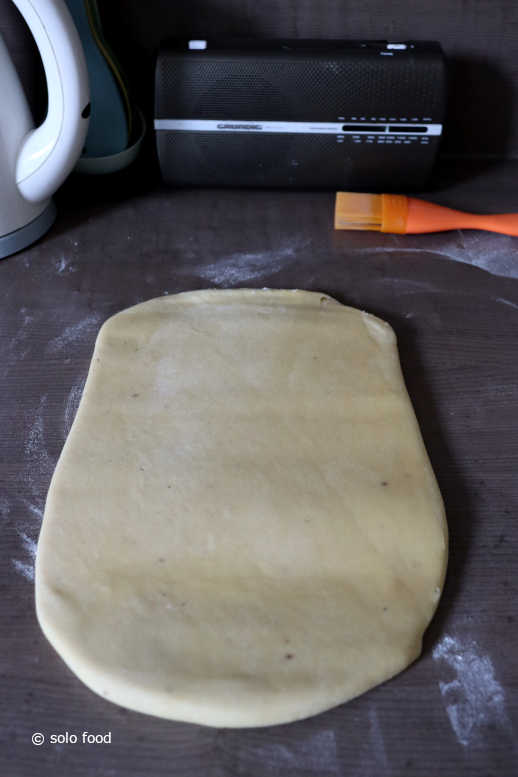
- Sprinkle some flour on the working plan and open the dough in a 23cm x 13cm rectangle
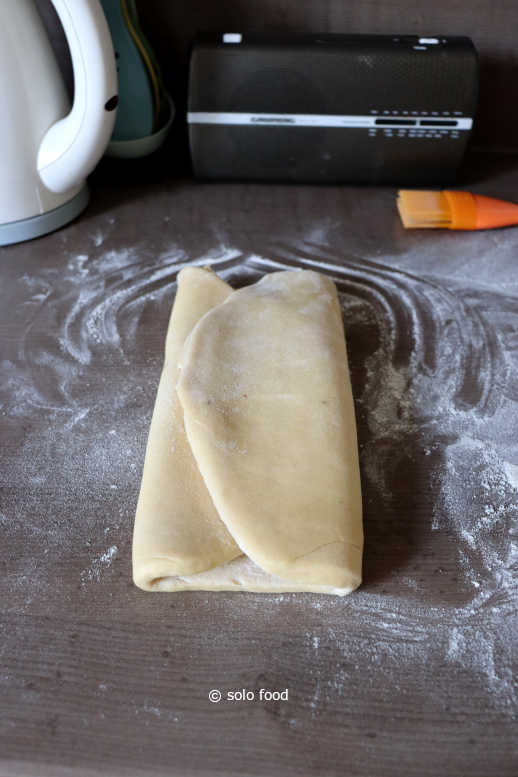
- Place the rectangle (square) of butter on the dough aligned at the bottom of the dough
- Fold the upper part of the dough towards the butter and on top of it
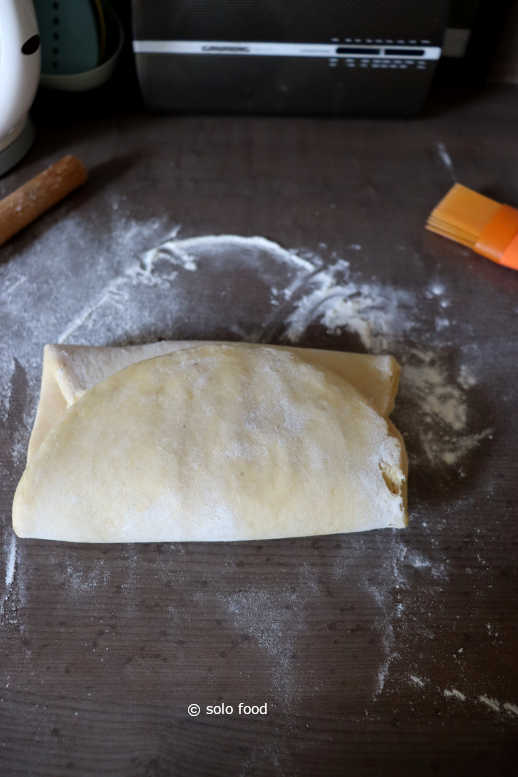
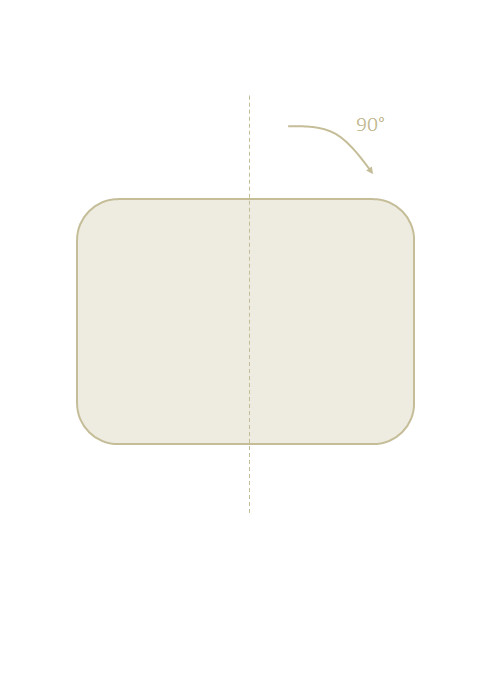
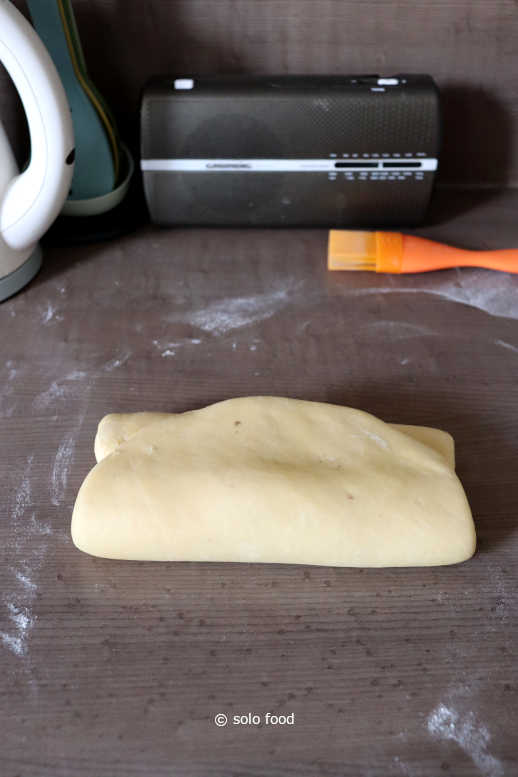
- Fold the lower part of the duo butter/dough in a way that forms an envelope, turn the envelope on your right for 90°
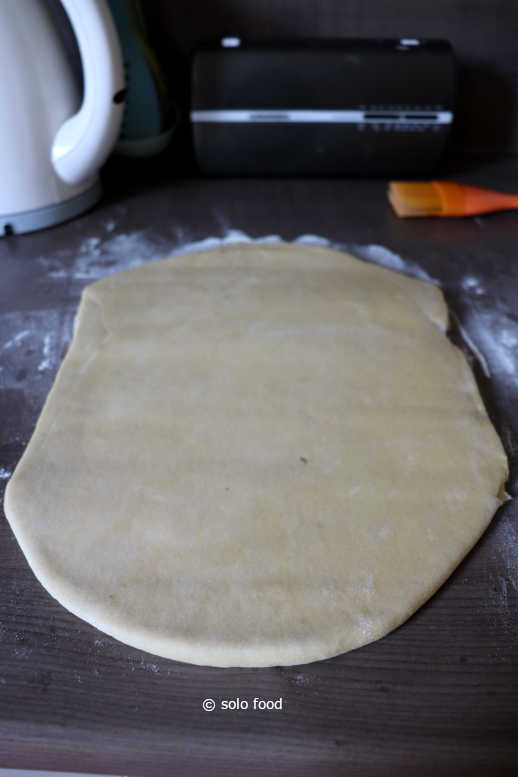
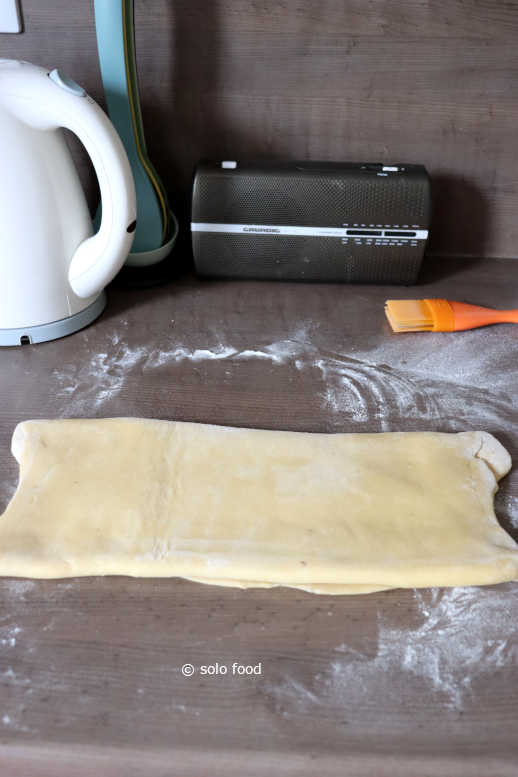
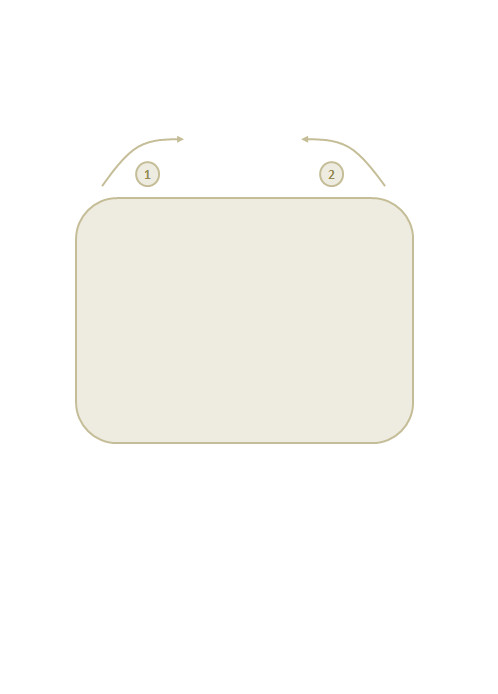
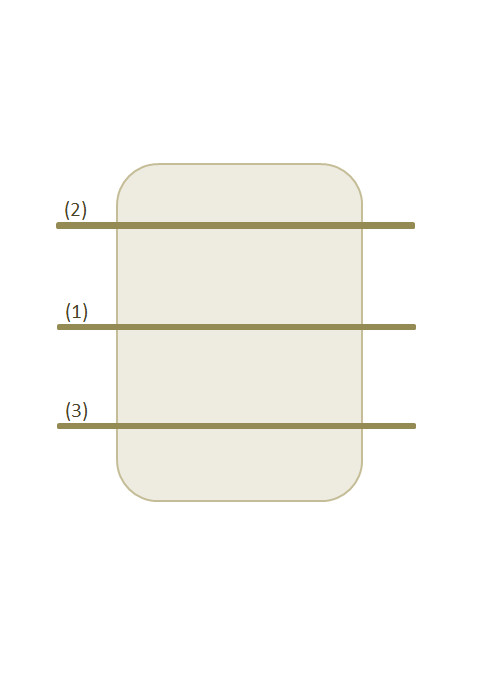
- With the rolling pin, press in the middle (1), spread it a bit, and then press towards the top (2), spread it a bit, and finish up by pressing towards the bottom (3) to spread it again; this way you are going to open the dough in a rectangle of 23cm x 13cm and this will be the turn #1
- Once the rectangle formed, turn sides as for the top side to face the working plan, and then turn the rectangle on your right for 90°
- Fold the dough again in an envelope by folding first the left side to the center and then the right side to the center as well; the envelope will be formed
- Spread again the dough in a rectangle of 23cm x 13cm as described above by pressing and spreading the three different spots 1,2,3 (turn #2)
- Sprinkle some flour in the working plan but remove the exceedance of flour from the dough using a cooking brush; normally there will be no need to add a lot of flour as the quantity of the butter is optimum
- Once the second rectangle formed, turn the dough towards the right for 90° and fold it again in an envelope (turn #3)
- Spread the dough in another rectangle of 23cm x 23cm by using the technique as described above by relying on the three pressing points 1,2,3
- Fold the dough in an envelope, cover it with plastic wrap and place it in the refrigerator until it becomes a bit harder (it can take several hours); the dough needs to be hard enough in order to work it again one last time


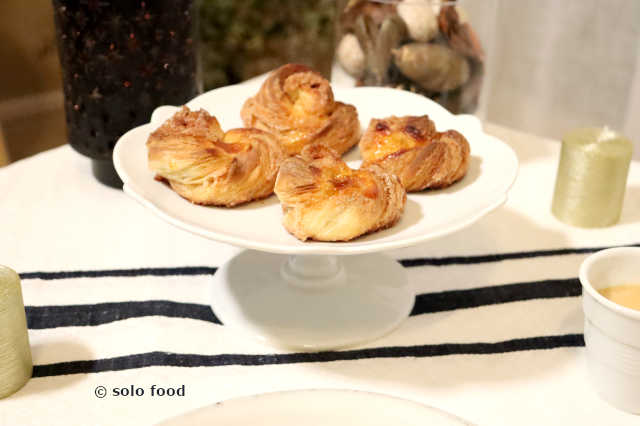
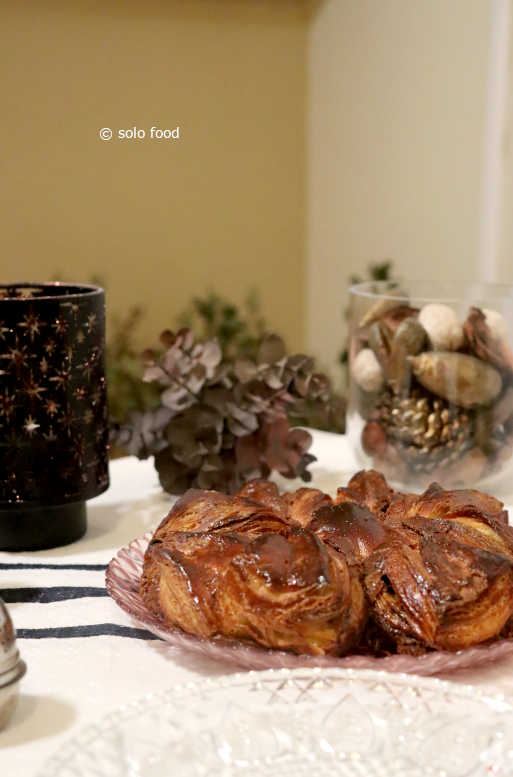
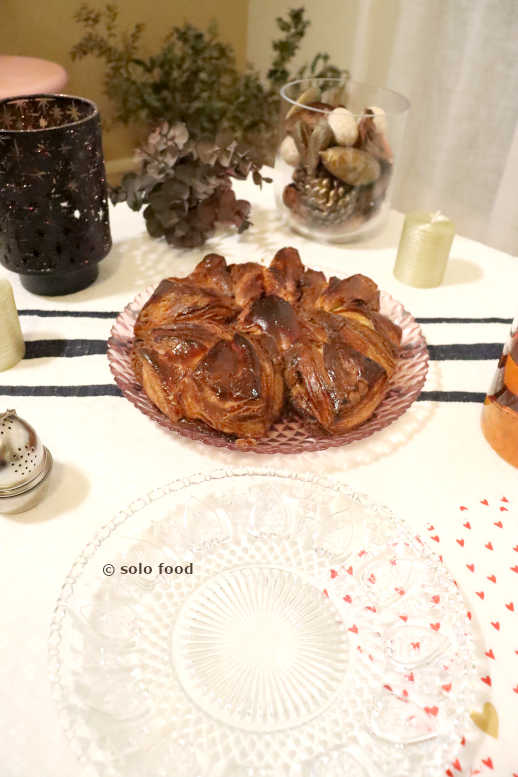
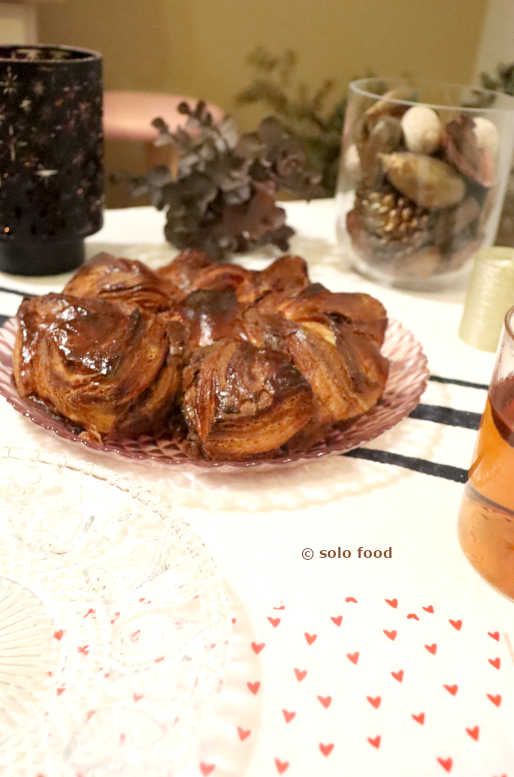
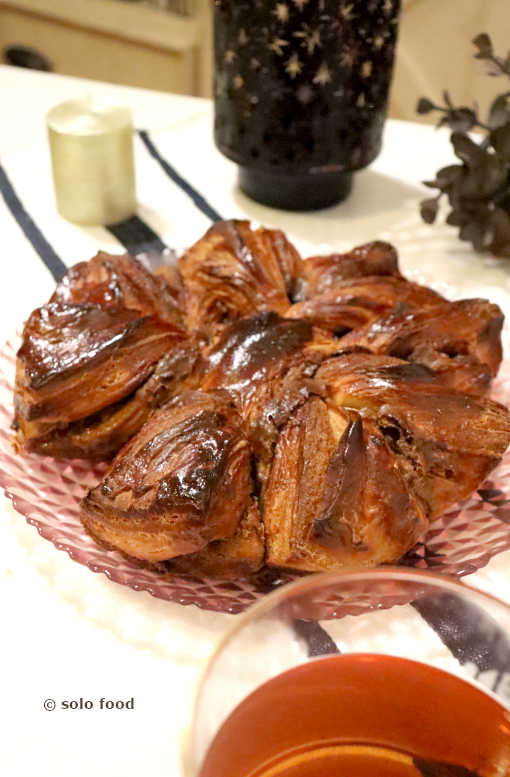
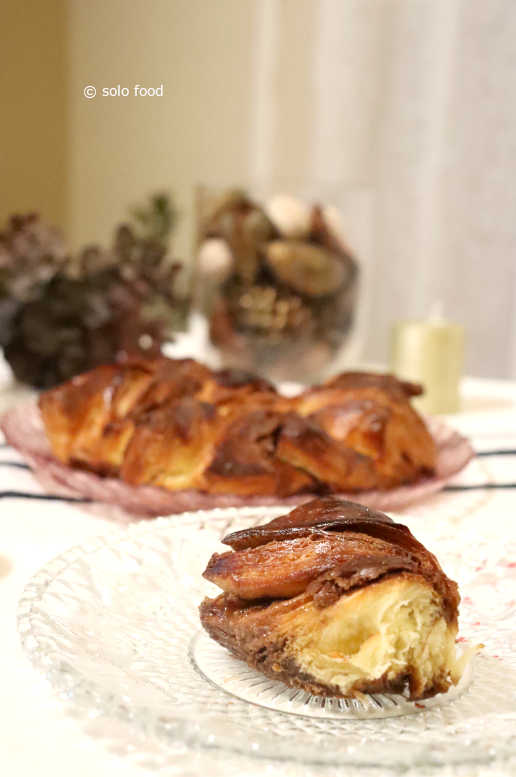
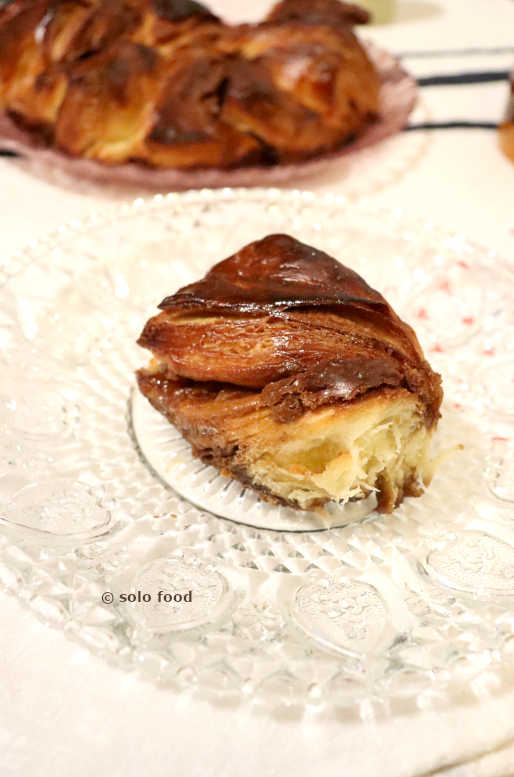
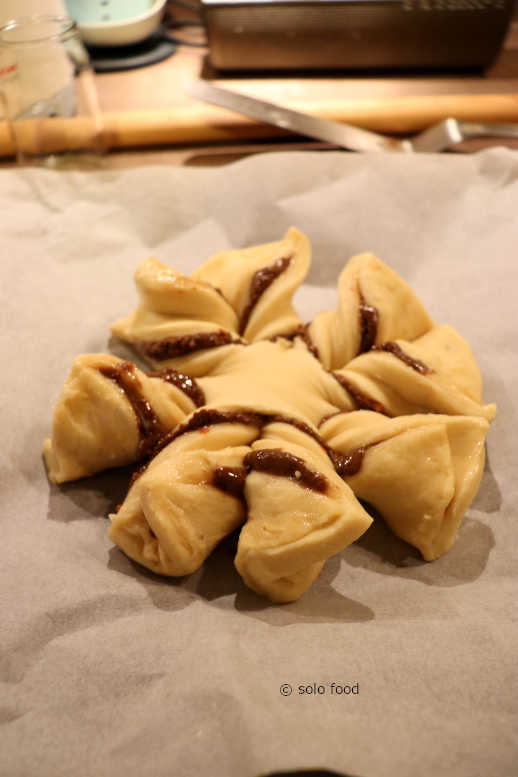
for the Danish with brown sugar and in a star shape
- In a bowl, stir together with a tablespoon:
- the rapadura sugar or the brown sugar
- the cinnamon
- the zest of the orange
- the orange juice
- Once it’s well stirred the sugar will be moist all over thanks to the orange juice that seems not much but it’s more than enough
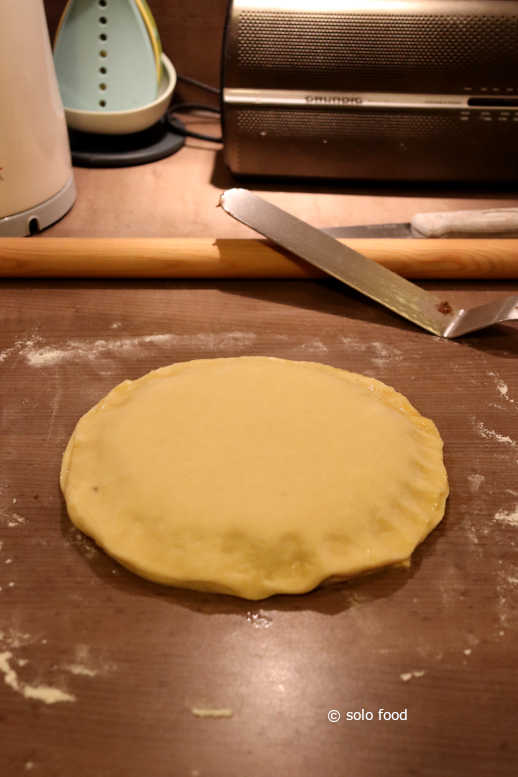
- Once the dough is quite hard after staying at the refrigerator, take it out and slice it in two
- Create two squares of 15cm x 15cm as thick as 0,5cm (I did make squares of 16cm x 16cm because I did not have a circle of 15cm of diameter that will be used afterwards)
- Place one of the squares on a tray going to the oven covered with parchment paper
- Beat an egg with a fork to use it for golden the dough as well as for glue together the dough
- Draw a circle of 15cm or 15cm of diameter on parchment paper and cut it off
- Place the circle on one of the two squares and cut off the dough in a circle
- Remove the exceedance of the dough as to keep a circle of dough
- Place the paper circle on the second square and cut off the second circle of dough
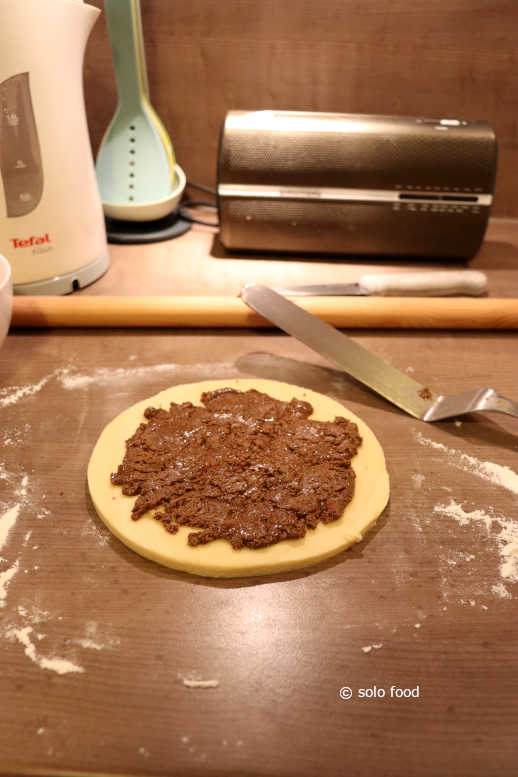
- Spread on the 1st circle the mix of brown sugar in a way to leave a border uncovered of 1cm of width
- Cover this border with beaten egg (egg wash)
- Place the 2th circle of dough on the first one
- Close well the border by pressing the border all over with your fingers
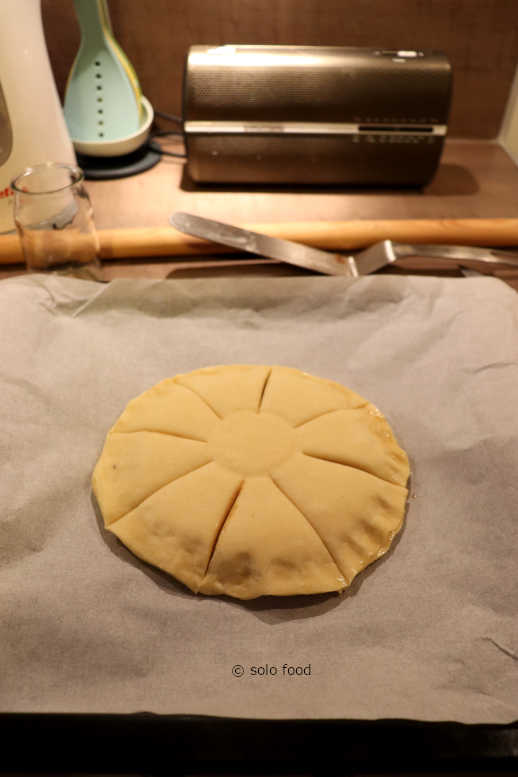
- In the center of the dessert, place a recipient or a circle made from parchment paper of a diameter of 5cm
- Slice the dough in 4 quarters of equal sizes around the inner circle without cutting up to the center of the dough but just until the border of the inner circle
- Next slice each quarter in two equal parts
- To form the star shape:
- take one half-quarter and turn it twice towards your right (for the quarters on the right)
- take the other neighbouring part on the same quarter and turn it on your left twice
- the dough is quite soft and it will be easy to make the two turns
- Cover with plastic wrap and let rest for 45’ outside the refrigerator
- After 30’, turn on the oven and preheat it at 190°C
- Remove the plastic wrap and spread the egg wash (beaten egg) all over the surface with a cooking brush
- Bake for 22’-24’ minutes until the top becomes quite golden
- Enjoy! An incredible treat!
- :-)

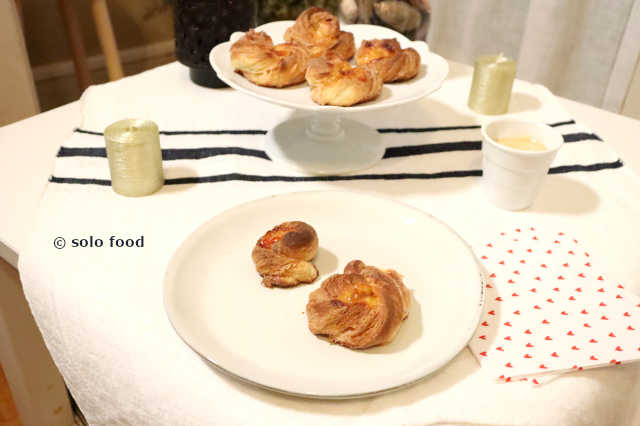
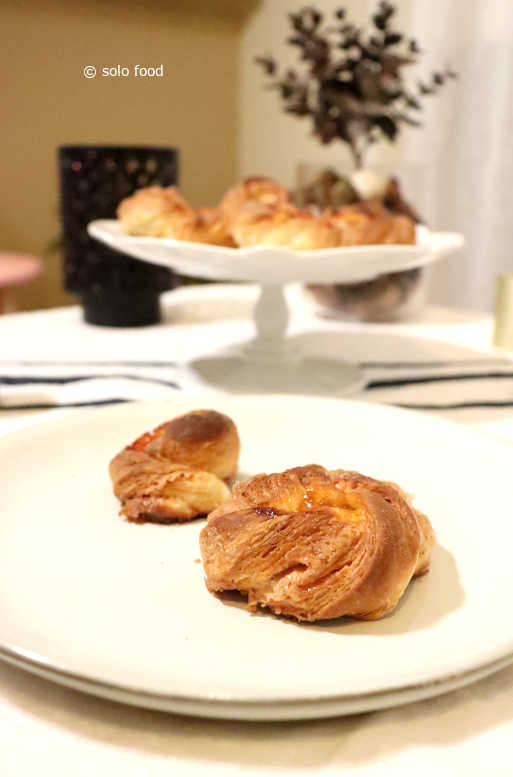
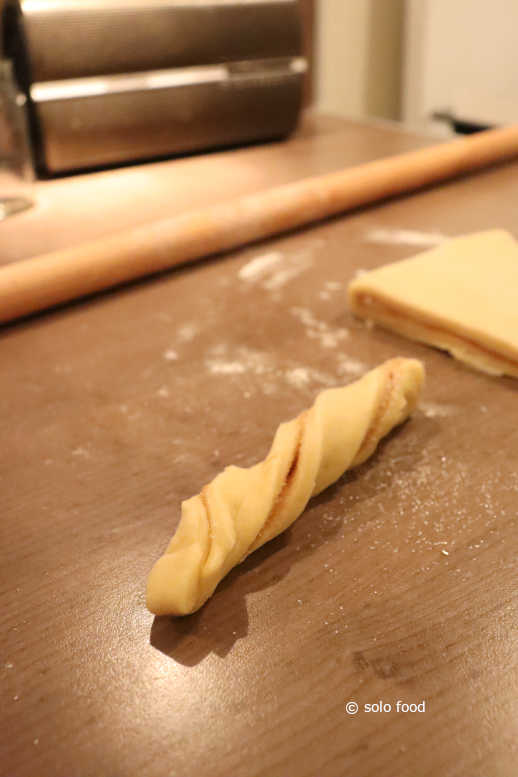
for the individual Danishes in a form of small snails
- Take what’s left of the dough and form a ball
- Slice it in two and if it’s soft, place both balls into the refrigerator to harden them a bit
- Stir well together the sugar and the cinnamon
- Once the dough has harden, take it out of the refrigerator
- Open one rectangle as thick as 0,5cm with one of the balls
- Cover its surface with the egg wash (beaten egg)
- Sprinkle the mix of sugar and cinnamon all over the dough
- Pass over the dough the rolling pin to help sugar get into the dough
- Take the part of the dough that is at the bottom, towards you, and fold it towards the top
- Turn the dough on your left in a way that the folding edge is on top
- Slice one strip of a 2cm width
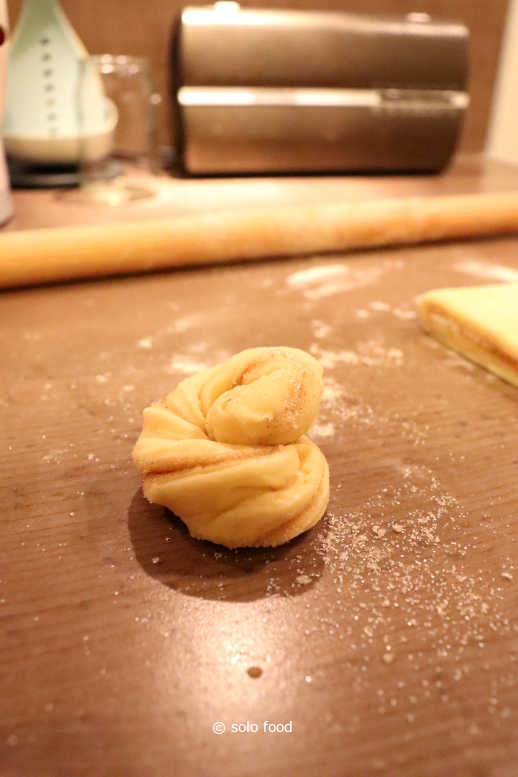
- To form the snail:
- Take the strip and stretch it horizontally
- Start turning it in a way to form a screw
- Fold it in a circle and place the folding end at the center and the free part underneath
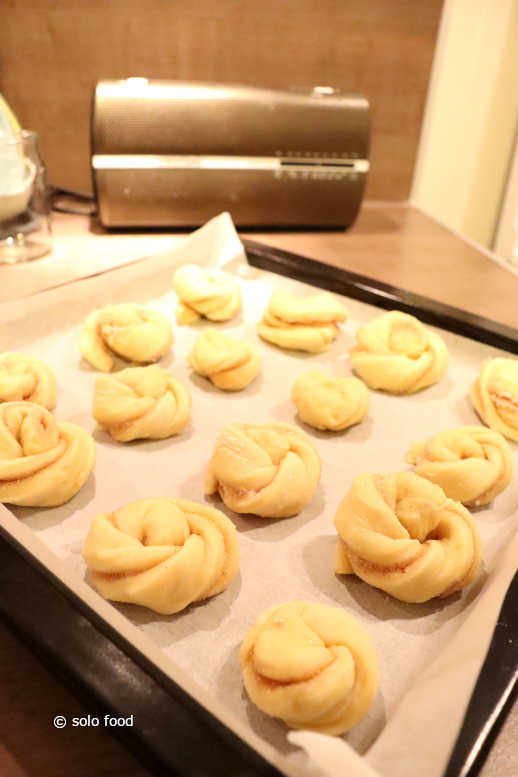
- Place the snail onto a tray going to the oven and covered with parchment paper
- Repeat the operation until there is no more dough
- Do the same thing for the 2th ball of dough
- Press a little bit in the center of each snail and place a little bit of apricot jam
- Bake for 20’ until the snail are golden
- Simply amazing!
- Enjoy!
What’s the story behind this recipe?
I had eaten Danish Pastry once when I was much younger during the 80ties! And I remember their taste until today that’s how good they were :-) I have loved them so much that I wanted to visit Denmark to eat more. Unfortunately, until this day I had not the chance to visit Denmark. It’s for that reason that I decided to make Danish Pastry and I might say I quite succeed in making them :-) It’s so good that I am going to make them once a month or every two months! It worth the effort and the waiting for the dough to rise and form itself. I will try to make variations as well with chocolate or nuts and I will add these experiments here :-) Try to make these Danish Pastry and you will not be disappointed :-) It really worth the effort and even if technical skills are required for this recipe, try to see them as a challenge to succeed! It’s up to you :-)
Inspiration
This recipe is an adjustment of the Martha Stewart recipe to make Danish Pastry. In this video, you will be able to watch the technique to open and make the dough as well as to find other recipes for other type of Danishes :-) Enjoy!
(*) the original recipe required ground cardamom, but I did not manage to find some, so I pressed the gains of cardamom with a knife and I opened them, took out the seeds and then I crashed them in the mortar to get a short of powder :-) It worked :-)
o-o C'est si bon ! o-o
- Categories: Vegetarian Food, Special Food, Desserts, Recipes
- Ingredients: butter, cinnamon, cardamom, flour, milk, levure boulangère, eggs, orange, rapadura, caster sugar


")